Showing posts with label appetizer. Show all posts

11.17.2011

Pumpkin Muffins


 I made these yummy cupcakes/muffins for a Halloween Party. I LOVE the pumpkin flavor. These had such a cool consistency. It was a mix between the crumby quality of muffins and the cake-like texture of cupcakes. And even better... they were so super easy! It only called for two ingredients, but I added in some spices and I loved it!


 So, just a cake mix (I used white... yellow would work too!), 15 oz of canned pumpkin and cinnamon and ginger.
 Just mix them together. I added 1 tsp cinnamon and 1/2 tsp ginger.
 No liquids, just the cake mix, the pumpkin and the spices.
 Its a thick batter, but go ahead and plop it into those cupcake liners.
 Bake for 20-25 minutes at 350. Yum!
 Cover with a dusting of powdered sugar, or if you're feeling like adding more sweetness to it, go ahead and whip up a cream cheese frosting! I loved it with the powdered sugar! Enjoy! I love pumpkin stuff and there will be more pumpkin recipes coming soon!!

Photobucket

11.13.2010

Creamy Vanilla Fruit Dip

Confession: I am not a big fruit eater...

And when I say big... I mean, not really at all. (Did I really just admit that?)

Its horrible, really, but its true. I just don't eat fruit fresh. I love making fruit drinks with my frozen fruit, but I just don't eat fruit fresh.

Okay, I'm glad I got that out there...

Now onto this recipe. This is one of the ABSOLUTE YUMMIEST fruit dips ever. I would seriously eat it with a spoon (minus the fruit, of course) if that were socially acceptable and nice on my waistline... but it is neither of those two, so I don't.

It is so simple too!

Here's the recipe, if you can even call it that!1 small package vanilla pudding mix
1 small container sour cream
milk(Tip for keeping apples from browning: Pour a little lemon juice over them. I keep mine in a bag until ready to serve with the lemon juice in there with them... Keeps them fresh and looking good!)

I don't even know the exact amount of milk to use because I never measure it. Just add some and use your electric mixer to mix away and keep adding milk until its the right consistency. Make it a little thin, as it will set up a little as pudding does... Set out on a pretty platter with your fruit and enjoy!
Photobucket

11.03.2010

Cream Cheese Rippled Pumpkin Bread

Doesn't that just sound heavenly?
It was...

I found this recipe from Lick the Bowl Good. Its definitely one of my "go-to" food blogs for great recipes.

I made this to take to a brunch with some friends one morning and it did not disappoint.Cream cheese filling:
8 ounce package cream cheese, room temperature
1/2 cup white sugar
2 large eggs
1 1/2 T. flourPumpkin Bread:

3 1/2 cups flour
1 tsp. baking powder
1 tsp. baking soda
3/4 tsp. salt
1 1/2 tsp. ground cinnamon
1/4 tsp. ground nutmeg
4 large eggs
2 cups white sugar
1 cup unsalted butter, melted and cooled
1- 15 ounce can pure pumpkin
1/2 cup water
1 1/2 tsp. vanilla extract

Preheat oven to 350. Butter and flour two 9x5 inch bread pans.

For the Cream Cheese Filling: Beat the cream cheese until smooth in a mixer. Add the sugar until smooth and creamy. Add eggs, one at a time, until just incorporated. Don't overmix! Stir in the flour and set aside.

For the Pumpkin Bread: Sift together the flour, powder, soda, salt, cinnamon and nutmeg in a large bowl and set aside. In another bowl, whisk together eggs until lightly beaten. Whisk in the sugar and melted butter. Then stir in the pumpkin, water, and vanilla.

Combine the flour and pumpkin mixtures, being careful not to overmix. Divide the batter in half. Then, take one half and divide it between the two bread pans. Pour half the cream cheese filling into each pan, then top with remaining half of batter. Smooth the tops and bake an hour, or until a toothpick comes out clean.
Note: I had a little trouble with "smoothing the tops"... They didn't quite smooth right and my cream cheese wasn't exactly the layer it should have been... Instead, it was kind of a blob in the middle of my bread, but it was still delicious... I have a theory that if you add a little more water to the pumpkin mix, it will be easier to pour and spread over the cream cheese layer. Try it or just try the original way and just go with it. Either way, it was delicious!


Cool on wire rack for 10 minutes, then turn our and cool loaves to room temperature.


Photobucket

10.12.2010

Sweet Potato Fries

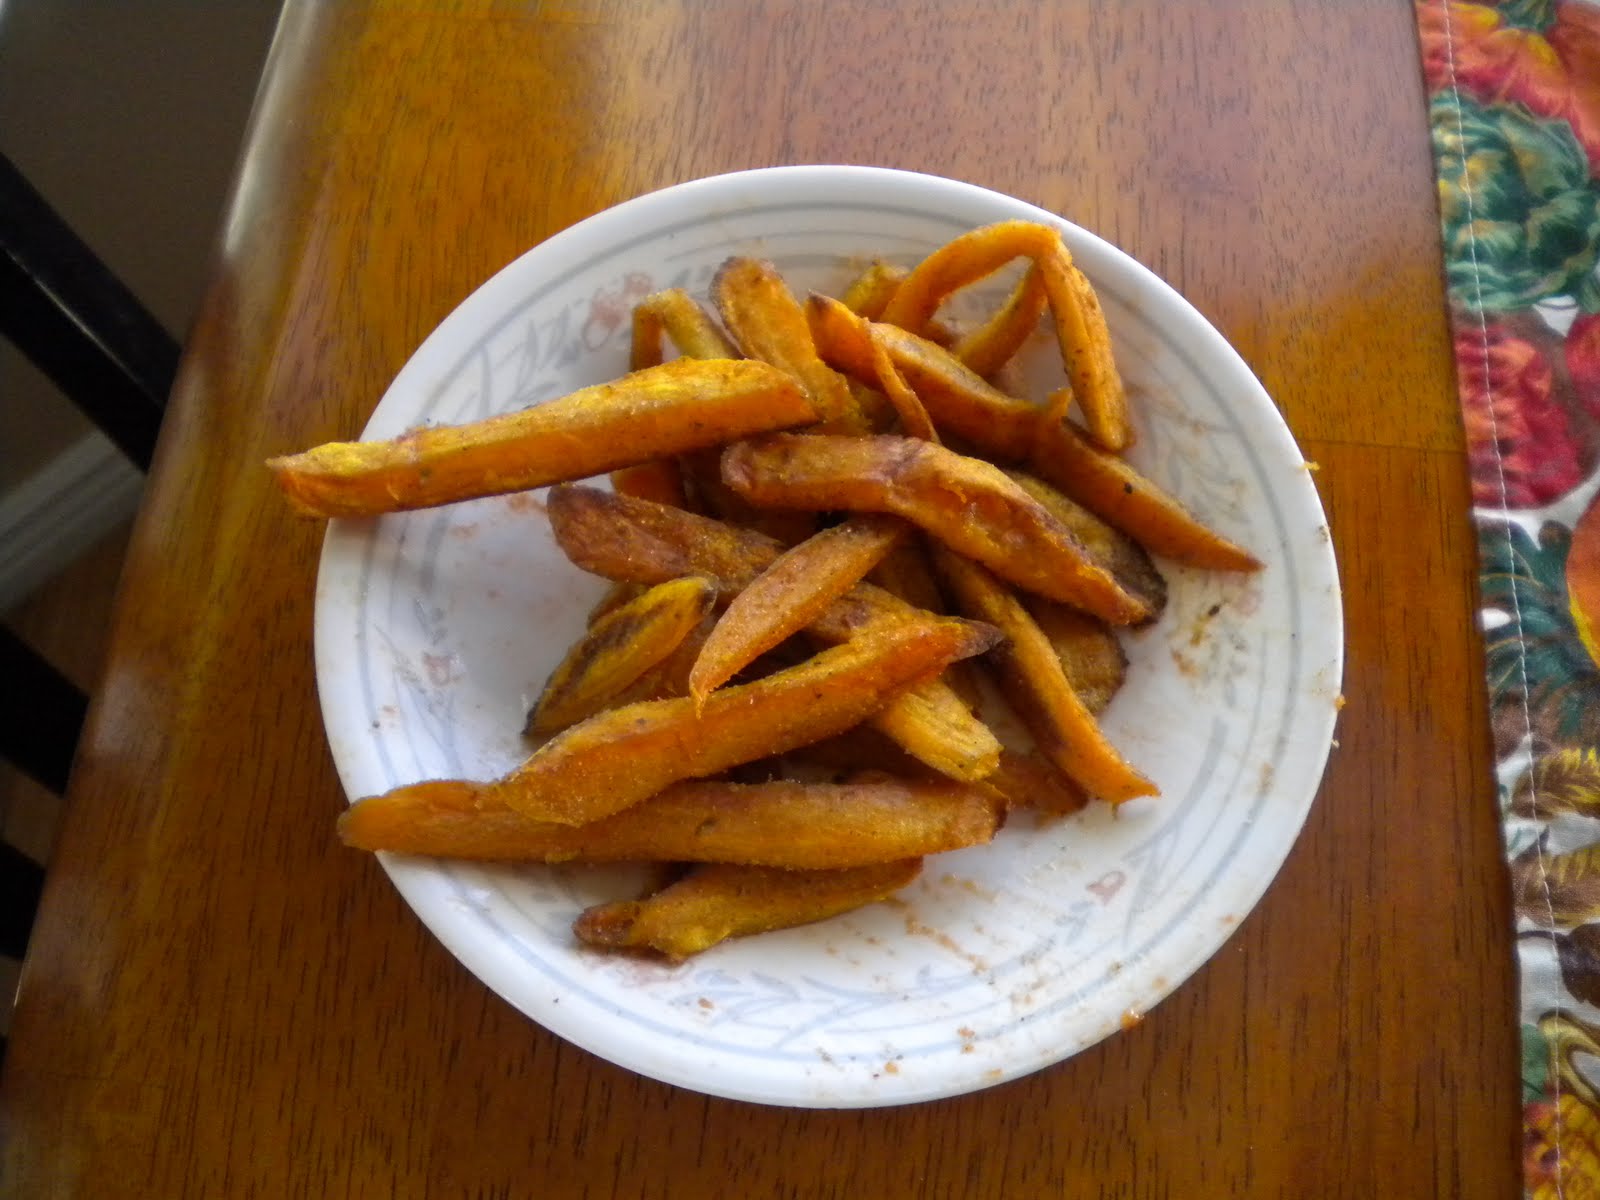
I have been ordering from Bountiful Baskets and I am loving all the produce we have gotten. A few weeks ago, we got some sweet potatoes and I was sooo excited! I have quite a few yummy recipes that I love, but I decided to make some sweet potato fries at my husband's request.

Here's the seasoning mix I chose to use:

2 tsp. Seasoned salt
1 tsp. tsp. paprika
1/2 tsp. chili powder
1/4 tsp. parsely
1/4 tsp. garlic powder

Peel your sweet potatoes and then cut them up until they are about 1/4 inch thick and 3 inches long (or however long your sweet potato is!)
Put the sweet potatoes in a plastic bag with 2 Tbsp. olive oil and shake until the potatoes are well coated. Add the seasoning mix to the plastic bag and SHAKE SHAKE SHAKE until they are well coated and the seasoning is evenly distributed. One suggestion I found online was to use 2 tsp. of the spice mixture for every 2 sweet potatoes depending on how spicy you like it.
Bake at 425 for 40 minutes turning once halfway. Once they come out of the oven, top them with more seasoned salt. Serve immediately... They were so yummy and perfect to eat watching a BYU football game... Enjoy!

Photobucket

9.30.2010

Down to Earth Granola

This is one of those yummy recipes that I got from one of my sisters... I have a lot of those, you know. Recipes from my sisters that is... and I have lot of sisters too. 4 to be exact. As well as 2 more sisters (who are my brother's wives) and then 4 sisters-in-law on my husband's side. Thankfully, they are all very willing to share their yummy recipes with me. Love them!

Okay, on to the recipe. I LOVE granola but I am just not a huge fan of anything I can find in the store. They are usually sold with raisins or they just aren't "clumpy" enough... Anyway, this recipe produces the YUMMIEST granola and if you like granola plain, granola with milk, or granola on top of your yogurt... then this is the recipe for you! Trust me!

Ingredients:
4 cups oats
1 1/2 cups sliced almonds
1/2 cup brown sugar
1/2 tsp. salt
1/2-1 tsp. cinnamon

1/3- 1/2 cup vegetable oil
1/3-1/2 cup honey
1 tsp vanilla

1 cup raisins or craisins (optional) I don't put these in because, like I said... I don't enjoy raisins in my granola.

Directions:
Preheat oven to 300 degrees.
Stir together dry ingredients (first 5) in large bowl.

Heat oil, honey, and vanilla in saucepan until warm.
Carefully pour over oats mixture and gently stir (you want to try
to maintain some bigger clumps).
Spread on cookie sheet.

Bake 30 minutes, turning with spatula every 10 min.

Don't mind my obnoxiously pink fingernails... I'm helping my husband coach volleyball and last night we had a game. The high school's colors are red/black but the school board chairperson is from here and recently started treatment for breast cancer. So we all wore our "Love, Hope, Volley" T-shirts and painted our nails pink in support of her...
Cool completely.
Stir in raisins or craisins, if desired.
*Watch carefully during cooking to make sure it is not getting
burnt.

Store in an airtight container. I need to get a plastic cereal container from IKEA next time I'm there to store my granola in so that I can pour it... but until then, this container will do.
Now try to pace yourself... It is so delicious! My favorite way to eat it is over yogurt... vanilla is the best, but today I only have strawberry and peach so PEACH won out this time.
This will be my breakfast EVERY.SINGLE.MORNING. until its gone... Its just that good.
Photobucket

9.16.2010

Makin' Salsa

Ever since I was a teenager, I have been making salsa every single summer. My parents grew a huge garden every year (which I hated at the time... but now I very much envy) and they would grow tomatoes and peppers with which to make salsa. The summer that I was the only child left at home, my parents and I had a system. My dad would wake up first and pick the tomatoes and peppers and grill them. He would put everything into bowls and leave in the refrigerator for me. When I woke up (hours later...) it was my job to skin all the peppers and tomatoes, chop everything up (onions, cilantro, peppers, tomatoes, and garlic) and add the other ingredients and mix it and leave it ready for my mother who would then can and process the jars to seal them.

Unfortunately, now that I'm an adult, I have to do all the steps of this salsa making by myself, with occasional help from my husband when he is home to help!

Therefore... I have eliminated the grilling from the recipe. I don't think it adds very much to the overall flavor and it takes SOOO much time.


My sister told me that she just blanches her tomatoes... which I have to admit, I had no idea what it meant to "blanch" something.

So.. here's my recipe for Salsa (and instructions for blanching tomatoes)

Ingredients:

25 medium tomatoes
3 yellow peppers
5 green bell peppers
6-9 jalapenos
(without seeds... the more seeds you leave in, the hotter the salsa will be)
1 bunch cilantro
(I put in 2 bunches because I like a lot of cilantro flavor)
3-4 cloves garlic
2-3 onions
1/2 cup apple cider vinegar
1/4 cup salt
To blanch my tomatoes, I use my sink. I tied a string (or ribbon) to my drain plug and then filled the sink with my tomatoes. Boil a large pot of water.
Pour your boiling water over the tomatoes and let sit for about 4-5 minutes. Then pull the string to release the water. I have to admit that I had a little trouble with all of my tomatoes blanching. The skins should start to peel and roll, but if they don't do that, they will usually peel right off if you just use a little knife to cut the skin open. Even if they don't look like they have blanched properly, they probably have and you just need to help them get started.

I don't find the skins of the peppers to be a problem, but the skins of the tomatoes really bother me in my salsa, so I make sure I get all of them off.

Chop all your ingredients to the size and texture you like for salsa. I like mine chopped really small so I use my little mini-food-chopper. Thankfully, I have help in operating it so that I can keep chopping other peppers while he is chopping in the machine...

And then we have to clap and celebrate each time he does such a good job chopping the onions and peppers for me. Mix all ingredients together. This can be eaten fresh (and is soooo very tasty) or it can be canned and processed like I love to do. I usually make either 5-6 quart jars or 10-12 pints.

I use my hot water bath to seal the jars, processing quarts for 45 minutes and pints for 35 minutes.

TIP: Make sure when you are handling the jalapeno peppers that you wear gloves. I use those yellow bathroom type of gloves and I have them specially labeled and with my canning supplies. The juices from the jalapeno peppers can burn your hands and your hands will be burning for hours and hours... Just trust me... I've done it and its not fun!

Happy Salsa Making!
Photobucket

8.07.2010

Chile and Cheese Spirals

Yet another new recipe I tried for the blessing last weekend. I have had these bookmarked forever and finally had an occasion to make them. Unfortunately, I accidentally erased my bookmark after I printed the recipe, and can't remember where I found the recipe to give due credit...

4 oz. cream cheese, softened
1 cup shredded cheddar cheese
1/2 cup (4 oz can) diced green chiles
1/4 cup sliced green onion
1/2 cup chopped red bell pepper
1/4 cup chopped ripe olives
4 (8-inch) soft taco-sized flour tortillas
Salsa
Combine cream cheese, cheddar cheese, chiles, onion, red pepper and olives in a medium bowl. Stir until well mixed. Spread 1/2 cup mixture over each tortilla and roll up. Wrap each roll in plastic wrap twisting ends to close and refrigerate at least 1 hour. I made mine the night before. Remove plastic wrap when ready to serve and slice each roll into 3/4 inch pieces and serve with salsa for dipping.

Suggestion: I really liked these, but I would have LOVED them even more if they had less onion in them. The original recipe called for 1/2 cup, I only used 1/4 cup and I think I would only use 1/8 of a cup next time... A little too onion-y for me!

Photobucket

6.05.2010

Garlic Oven Baked Fries

I have had this recipe bookmarked for so many months and finally got around to trying it... It was so worth it and you are going to want to try these! I absolutely love potato wedges and these were oh so good!

Ingredients:

8 garlic cloves, minced
6 tbsp extra virgin olive oil
3 russet potatoes (about 8oz each), each cut into 12 wedges
3 tbsp cornstarch/cornflour
1 1/2 tsp coarse sea salt
1 1/2 tsp freshly ground black pepper
½ tsp garlic powder
1/4 tsp cayenne pepper

First wash and cut the potatoes up into wedges. Preheat your oven to 450.

In a pan, heat the olive oil and garlic on a very low heat- Just to infuse the oil with the garlic. Then, using a sieve, separate your garlic and oil. Put garlic over the potatoes with 1 Tbsp of the oil and stir. YUM!
Put oil onto a baking sheet:
Cover your bowl of potatoes with plastic wrap and microwave them for 4-5 minutes.

In the meantime, mix the cornstarch, salt, pepper and cayenne

Be careful when they come out of the microwave... they are HOT! Sprinkle the seasonings over the potatoes and stir gently. Then transfer to the baking sheet and pop them in the oven. Bake for 15 minutes on one side and then turn them over and bake for another 15 minutes.
Photobucket
 
Blog Design By: Simply Yours Designs