Showing posts with label fruit. Show all posts

11.13.2010

Creamy Vanilla Fruit Dip

Confession: I am not a big fruit eater...

And when I say big... I mean, not really at all. (Did I really just admit that?)

Its horrible, really, but its true. I just don't eat fruit fresh. I love making fruit drinks with my frozen fruit, but I just don't eat fruit fresh.

Okay, I'm glad I got that out there...

Now onto this recipe. This is one of the ABSOLUTE YUMMIEST fruit dips ever. I would seriously eat it with a spoon (minus the fruit, of course) if that were socially acceptable and nice on my waistline... but it is neither of those two, so I don't.

It is so simple too!

Here's the recipe, if you can even call it that!1 small package vanilla pudding mix
1 small container sour cream
milk(Tip for keeping apples from browning: Pour a little lemon juice over them. I keep mine in a bag until ready to serve with the lemon juice in there with them... Keeps them fresh and looking good!)

I don't even know the exact amount of milk to use because I never measure it. Just add some and use your electric mixer to mix away and keep adding milk until its the right consistency. Make it a little thin, as it will set up a little as pudding does... Set out on a pretty platter with your fruit and enjoy!
Photobucket

11.01.2010

Canning Apple Pie Filling

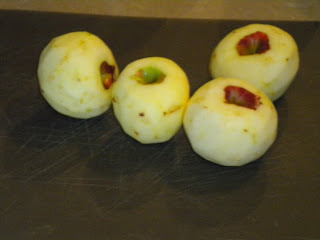
Do you have too many apples?

Well, I did and this is how I used them... to make apple pie filling for when I need to make a quick and easy dessert... Make a pie crust (or buy one... I won't tell!) dump this in top with another pie crust or a crumb topping and bake it! So easy!

First, peel your apples and slice into small wedges.Fill your quart jars with apples.

Then make this sauce:

4 1/2 cups sugar
1 c. corn starch
2 tsp. cinnamon
1/4 tsp nutmeg
1 T. salt
10 cups cold water

Add those 6 ingredients together and put on the stove. Bring mixture to low boil and boil until it starts to thicken. Take off burner when you think its the right consistency (keep it a little on the runny side... it will thicken more after you take it off the burner) and stir in 3 T. lemon juice. DO NOT FORGET THE LEMON JUICE!! It is imperative for the preservation of the apples!

(My husband told me it looks like gravy.... )

Pour this sauce over your apples in the jars. This recipe will fill about 7 quarts. Use a knife to get down into the jars and get all the air bubbles out. Make sure you really get as many bubbles out as you can. The more air you have in your jars, the more likely they are to crack during processing.

Then put your lids in place. Warm your lids in a small saucepan on the stove to soften the rubber ring. This helps them to seal.

Attach rings over lids and process your quarts for 25-30 minutes. Remove from hot water bath and leave them alone. Mine took FOREVER to seal, but they finally did. Have patience... Let them seal on their own- Don't push down on the lid. If they are going to seal, they will pop on their own!


Photobucket
 
Blog Design By: Simply Yours Designs