Showing posts with label breakfast. Show all posts

11.17.2011

Pumpkin Muffins


 I made these yummy cupcakes/muffins for a Halloween Party. I LOVE the pumpkin flavor. These had such a cool consistency. It was a mix between the crumby quality of muffins and the cake-like texture of cupcakes. And even better... they were so super easy! It only called for two ingredients, but I added in some spices and I loved it!


 So, just a cake mix (I used white... yellow would work too!), 15 oz of canned pumpkin and cinnamon and ginger.
 Just mix them together. I added 1 tsp cinnamon and 1/2 tsp ginger.
 No liquids, just the cake mix, the pumpkin and the spices.
 Its a thick batter, but go ahead and plop it into those cupcake liners.
 Bake for 20-25 minutes at 350. Yum!
 Cover with a dusting of powdered sugar, or if you're feeling like adding more sweetness to it, go ahead and whip up a cream cheese frosting! I loved it with the powdered sugar! Enjoy! I love pumpkin stuff and there will be more pumpkin recipes coming soon!!

Photobucket

11.13.2010

Creamy Vanilla Fruit Dip

Confession: I am not a big fruit eater...

And when I say big... I mean, not really at all. (Did I really just admit that?)

Its horrible, really, but its true. I just don't eat fruit fresh. I love making fruit drinks with my frozen fruit, but I just don't eat fruit fresh.

Okay, I'm glad I got that out there...

Now onto this recipe. This is one of the ABSOLUTE YUMMIEST fruit dips ever. I would seriously eat it with a spoon (minus the fruit, of course) if that were socially acceptable and nice on my waistline... but it is neither of those two, so I don't.

It is so simple too!

Here's the recipe, if you can even call it that!1 small package vanilla pudding mix
1 small container sour cream
milk(Tip for keeping apples from browning: Pour a little lemon juice over them. I keep mine in a bag until ready to serve with the lemon juice in there with them... Keeps them fresh and looking good!)

I don't even know the exact amount of milk to use because I never measure it. Just add some and use your electric mixer to mix away and keep adding milk until its the right consistency. Make it a little thin, as it will set up a little as pudding does... Set out on a pretty platter with your fruit and enjoy!
Photobucket

11.03.2010

Cream Cheese Rippled Pumpkin Bread

Doesn't that just sound heavenly?
It was...

I found this recipe from Lick the Bowl Good. Its definitely one of my "go-to" food blogs for great recipes.

I made this to take to a brunch with some friends one morning and it did not disappoint.Cream cheese filling:
8 ounce package cream cheese, room temperature
1/2 cup white sugar
2 large eggs
1 1/2 T. flourPumpkin Bread:

3 1/2 cups flour
1 tsp. baking powder
1 tsp. baking soda
3/4 tsp. salt
1 1/2 tsp. ground cinnamon
1/4 tsp. ground nutmeg
4 large eggs
2 cups white sugar
1 cup unsalted butter, melted and cooled
1- 15 ounce can pure pumpkin
1/2 cup water
1 1/2 tsp. vanilla extract

Preheat oven to 350. Butter and flour two 9x5 inch bread pans.

For the Cream Cheese Filling: Beat the cream cheese until smooth in a mixer. Add the sugar until smooth and creamy. Add eggs, one at a time, until just incorporated. Don't overmix! Stir in the flour and set aside.

For the Pumpkin Bread: Sift together the flour, powder, soda, salt, cinnamon and nutmeg in a large bowl and set aside. In another bowl, whisk together eggs until lightly beaten. Whisk in the sugar and melted butter. Then stir in the pumpkin, water, and vanilla.

Combine the flour and pumpkin mixtures, being careful not to overmix. Divide the batter in half. Then, take one half and divide it between the two bread pans. Pour half the cream cheese filling into each pan, then top with remaining half of batter. Smooth the tops and bake an hour, or until a toothpick comes out clean.
Note: I had a little trouble with "smoothing the tops"... They didn't quite smooth right and my cream cheese wasn't exactly the layer it should have been... Instead, it was kind of a blob in the middle of my bread, but it was still delicious... I have a theory that if you add a little more water to the pumpkin mix, it will be easier to pour and spread over the cream cheese layer. Try it or just try the original way and just go with it. Either way, it was delicious!


Cool on wire rack for 10 minutes, then turn our and cool loaves to room temperature.


Photobucket

9.30.2010

Down to Earth Granola

This is one of those yummy recipes that I got from one of my sisters... I have a lot of those, you know. Recipes from my sisters that is... and I have lot of sisters too. 4 to be exact. As well as 2 more sisters (who are my brother's wives) and then 4 sisters-in-law on my husband's side. Thankfully, they are all very willing to share their yummy recipes with me. Love them!

Okay, on to the recipe. I LOVE granola but I am just not a huge fan of anything I can find in the store. They are usually sold with raisins or they just aren't "clumpy" enough... Anyway, this recipe produces the YUMMIEST granola and if you like granola plain, granola with milk, or granola on top of your yogurt... then this is the recipe for you! Trust me!

Ingredients:
4 cups oats
1 1/2 cups sliced almonds
1/2 cup brown sugar
1/2 tsp. salt
1/2-1 tsp. cinnamon

1/3- 1/2 cup vegetable oil
1/3-1/2 cup honey
1 tsp vanilla

1 cup raisins or craisins (optional) I don't put these in because, like I said... I don't enjoy raisins in my granola.

Directions:
Preheat oven to 300 degrees.
Stir together dry ingredients (first 5) in large bowl.

Heat oil, honey, and vanilla in saucepan until warm.
Carefully pour over oats mixture and gently stir (you want to try
to maintain some bigger clumps).
Spread on cookie sheet.

Bake 30 minutes, turning with spatula every 10 min.

Don't mind my obnoxiously pink fingernails... I'm helping my husband coach volleyball and last night we had a game. The high school's colors are red/black but the school board chairperson is from here and recently started treatment for breast cancer. So we all wore our "Love, Hope, Volley" T-shirts and painted our nails pink in support of her...
Cool completely.
Stir in raisins or craisins, if desired.
*Watch carefully during cooking to make sure it is not getting
burnt.

Store in an airtight container. I need to get a plastic cereal container from IKEA next time I'm there to store my granola in so that I can pour it... but until then, this container will do.
Now try to pace yourself... It is so delicious! My favorite way to eat it is over yogurt... vanilla is the best, but today I only have strawberry and peach so PEACH won out this time.
This will be my breakfast EVERY.SINGLE.MORNING. until its gone... Its just that good.
Photobucket

9.01.2010

Maple Chocolate Chip Pancake Muffins

Whew! Is that a long enough name??

The original recipe for these said to make them in a mini muffin tin, but when I did that, I could not for the life of me get them out in one piece. These were delicious, but I would suggest you do them in cupcake papers in a normal size muffin tin.

That said... the reason I have no pictures for this recipe is two-fold:

1. I was in a huge hurry. I made these for a brunch I was hosting at my house and in between cleaning my house and trying to tend my two littles and make these... I just didn't get any pictures...

AND

2. Because I made them in the mini muffin pan, they did not come out clean and were therefore not pretty enough to take pictures of...

SO THERE... There's my excuse. But trust me, they were tasty!

1 cup flour
1 tsp. baking powder
1/2 tsp. baking soda
1/4 tsp. salt
2 Tbsp. sugar
2/3 cup buttermilk
1 egg
2 Tbsp. pure maple syrup
2 Tbsp. melted butter
1/2 cup milk chocolate chips

Preheat oven to 350
Combine flour, baking powder, baking soda, salt and sugar.
Stir w/ wire whisk.
In another bowl stir buttermilk, egg, maple syrup and melted butter until just combined.
Add wet ingredients to dry ingredients with spoon until combined. Stir in chocolate chips. You may want to reserve a few to sprinkle on the tops just after pulling them out of the oven.
Bake in 350 oven for 8-9 min. for mini muffins and 15-18 minutes for regular sized muffins. Enjoy!
Photobucket

7.26.2010

Brown Sugar Muffins

1 cup brown sugar
1 cube butter/margarine
1 egg
1 cup milk
2 cups flour
1 tsp baking soda
1/8 tsp salt

Here's my little helper with all my ingredients:
Cream brown sugar and butter. Add remaining ingredients and mix well. Put in paper lined muffin tinsBake at 400 for 12-18 minutes. Just watch closely. I use whole wheat flour and I love it, but it definitely decreases the cooking time. If you use all white flour, you will have to cook them longer. These are so yummy and I love having them for breakfast/snack throughout the day... Enjoy!


Photobucket

3.25.2010

Breakfast Pizza

This recipe is a family favorite of mine. Every year, since before I can remember, we have eaten this for breakfast on Christmas. We rarely have it any other time, but I decided to make it for dinner a couple weeks ago and I remembered how much I absolutely love it.
Make it... you won't regret it (unless you already have high cholesterol and a lot of plaque build up in your arteries... That's just the nurse part of me talking though....)
Ingredients:
2 packages crescent rolls

6 eggs
1/4 cup milk
1/2 tsp. salt
1/4 tsp. pepper
2 T. parmesan

1 cup hashbrowns
1 lb. sausage
1 cup cheese

Directions:
Press crescent rolls onto bottom of cookie pan and smoosh (very official term) the edges together so there are no gaps. It should almost fill a cookie sheet. Precook crust in 350 oven for 8-10 minutes. You want it mostly cooked. In the time that is cooking, mix together the eggs, Parmesan, salt, pepper and milk and completely cook.
Also cook your sausage and hashbrowns (I always put about a Tbsp of oil in the hashbrowns to help them cook). Once everything is cooked/heated through, and your crust is done precooking, layer your toppings on the crust: Eggs, hashbrowns, sausage and then the cup of cheese. Cook for 20 minutes on 350 until cheese is melted.

Seriously... doesn't that look delicious? I could probably eat this every night. It is so yummy. We eat it with a little salsa and it adds just the right kick to it. YUM!Photobucket

2.20.2010

Fastest Ever Cinnamon Rolls

...And probably the only cinnamon roll I will ever make again! These were so easy and didn't take HOURS on end to make. I didn't have to get up at o-dark-thirty to start these in order to eat these for breakfast. YUM. Try them... You'll be convinced too. 1 hour from start to eating them.

I got this recipe from Lick the bowl good- one of my favorite cooking blogs. Check her out!

Preheat oven to 400 degrees. Grease sides and bottom of a 9x13 pan with cooking spray.

For the dough:
3/4 cup. cottage cheese (The recipe calls for 4% milk fat, but I only had 2%, so that's what I used!)
1/3 cup buttermilk (Buttermilk can be made using regular milk with 1 Tbsp. vinegar with 1 cup milk)
1/4 cup white sugar
4 Tbsp. unsalted butter, melted
1 tsp. vanilla extract
2 cups flour
1 Tbsp. baking powder
1/2 tsp. salt
1/4 tsp. baking soda
In a food processor (or blender) combine the cottage cheese, buttermilk, sugar, melted butter and vanilla. Process until smooth. If you have a food processor (which I don't) you can go ahead and add the flour, b.powder, salt and soda and process until the dough clumps together. If you don't have a food processor, put your dry ingredients in a bowl and pour the liquid out of your blender and mix by hand. The dough will be soft and moist. Scrape the dough out onto a lightly floured counter and knead it util smooth. With a rolling pin, roll the dough out into a 12x15 inch rectangle.

Filling:
1 1/2 Tbsp. unsalted butter, melted
2/3 cup. brown sugar
2 tsp. cinnamon
1 cup chopped pecans (or nut of your choice) optional

Brush the dough with the melted butter, leaving a half inch border around the edges. In a medium bowl, combine the brown sugar and cinnamon and sprinkle mixture over the entire buttered area, patting gently into the surface. Sprinkle nuts over top if using them.

Starting with the long side, roll the dough up, pinching the seam to seal and leaving the ends open. With a serrated knife, cut the roll into twelve equal pieces and set the rolls in the prepared pan. The rolls should fill the pan and touch slightly, but don't worry if there are small gaps... like mine:Bake at 400 for 20-28 minutes until golden brown and firm to the touch. Set pan on wire rack for 5 minutes.
For the glaze: 2/3 cup powdered sugar
1 Tbsp. butter, softened
2-3 Tbsp. cold milk
1 tsp. vanilla extract
In a small bowl, mix the ingredients to make the glaze. It should be thick but spreadable. If its too thin, just add a little more powdered sugar. I think I doubled this recipe... I can't remember, but I do like my rolls to have more glaze on them, so I probably did.

Drizzle glaze over the top and let stand a few minutes before serving.

These rolls are so fast because they don't use yeast- Instead they get their "rise" out of the baking powder. They are really delicious, but they do have a little bit more of a biscuit flavor than most cinnamon rolls. I don't think the taste was noticeable and I loved these. I love the idea that I don't have to get up at 5am to start cinnamon rolls for my family to eat for breakfast. Try them... I have a feeling you'll like 'em too!
Photobucket

6.25.2009

Jenn's Dinner Quiche

First off... Let me say that I am not a fan of regular quiche- and neither is Josh, but we both LOVE this one!
This recipe today comes from one of my good friends named Jenn. She is a fabulous cook and this recipe is no exception... and its even easy! She made this for a luncheon with the girls one time and I absolutely loved it. I called her one night because I was desperate for something to make and knew that it called for regular ingredients that I would already have.
So... Here it is!

1 1/3 cups flour
1/2 cup margarine (I use Butter flavor Crisco- I think it gives it a better taste)
4 T. cold water


That is the pastry shell- Cut the margarine into the flour first and then add the water. Press that into a pie pan. Since we are temporarily away from our permanent residence, I didn't bring all of my dishes- so I don't have my nice deep pie pans- and have been using those tin ones instead. The first time I made this here in Texas, I made WAY too much filling and had to throw a bunch away. This time, I just made sure my pastry shell was pressed down really well creating a really high edge for me to pour all the yummy-ness inside!
Filling:

1/2 cup milk
1/2 cup mayo
(I use about a 1/3 cup instead... I just can't bring myself to use a 1/2 cup!)
2 eggs (I use 3 eggs.... It seems to set up better for me!)
1T. Flour
dash of pepper
green onion
(Jenn told me that she usually just uses onion powder, so that's what I use as well!)
1/2 lb. ham, turkey, or veggies -chop them up pretty small
1 cup shredded cheese
Mix eggs, mayo and flour first, then add milk, then add the rest of the ingredients. I use a whisk to really get the milk, mayo, eggs and flour nice and smooth before I add anything else.

This is how I cook my bacon- I put it on a plate with lots of paper towels and microwave it for 3-5 minutes depending on your microwave- I obviously wanted it pretty crispy for this recipe. Cover the bacon with a paper towel on top to avoid a greasy mess in your microwave. Chop up all of the add-ins pretty small.

Pour into a pastry shell. Bake at 350 for 35-40 min. Jenn told me (and I have found it to be true) that it takes much longer for this to be done. With the extra egg, I think my cooking time is more like 45-50 minutes, but with only 2 eggs, it seemed to take a lot longer to set up for me. Quiche is done when knife comes out clean from center.

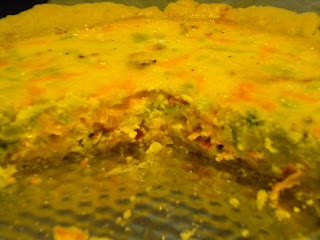
Ok... here's another tip. My first time making this, I thought it would be great if I threw in a bunch of different breakfast stuff (for the 1/2 lb of ham, turkey or veggies). It didn't taste so great- I threw in diced ham, bacon, brocolli, and shredded potatoes- and trust me... In this case... LESS is definitely MORE! The last two times I have made it I have kept it to either ham and brocolli, or bacon and brocolli (that's what this one is!) and it has tasted much better. Too many flavors just over-does the taste buds... Just trust me! Enjoy!!
And Jenn... you are the first to get to post the "I Was Featured" button on your blog if you want!

Photobucket
 
Blog Design By: Simply Yours Designs